How do I create a new EASE 4.x Project from a Sketchup model?
The first step is to keep in mind the usual requirements of an EASE 4.x project. Users creating a model in SketchUp should be aware of the conventions adopted by EASE. For instance, the proper orientation of Faces, and the correct application of Two-Fold Faces, among others.
Here you will find some hints for the construction process in order to successfully import a room into EASE 4.x.
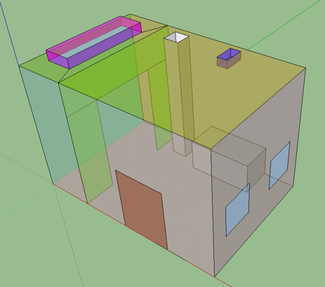
The following Tutorial-Room can be imported and will pass the Check Data process in EASE 4.x without errors:
Image
- Check the orientation of all room exterior Faces. The default material will show a light gray color from the outside.
If there are darker Faces in light blue, such as the ones shown in the next picture, you have to change the orientation of these Faces. In order to do this, you can use the “Reverse Faces” feature.Image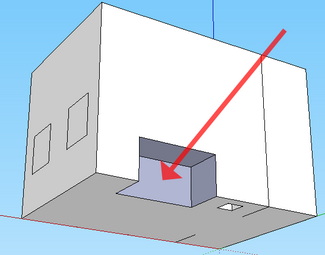
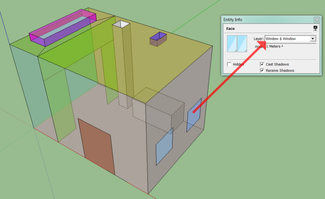
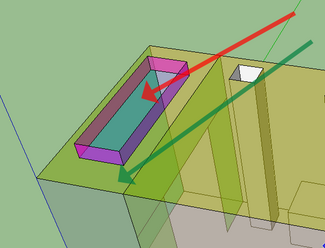
- If there are windows represented by holes in an exterior Face, draw the window Faces and make them part of a “Two Fold” Layer, here called “Window $ Window”. By using this syntax, EASE will automatically mark this Face as a Two-Fold Face during the import process.
Image
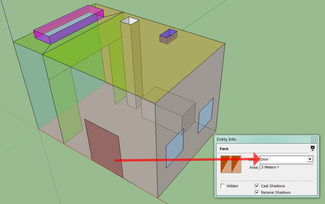
- The door in this model is not a hole in the room Face. It belongs to the room exterior itself. It is not Two-Fold.
Image
- If there is a column or a slot in a room Face, it makes a hole in the Face in SketchUp. A Face in EASE 4.x cannot have holes. Hence, the import process automatically brings the main Face without any holes, and creates separate smaller Faces for each hole. This is appropriate for EASE.
Image
The orientation of the smaller Faces will be reversed from the main Face without holes. It will also be marked as “Coat of” the main Face, automatically.Image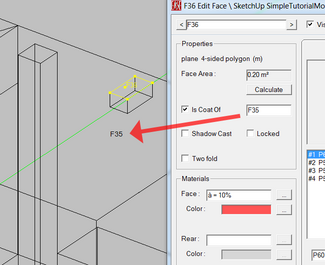
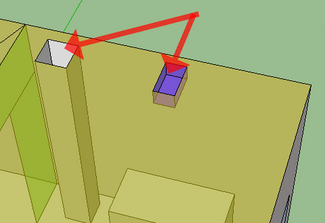
- If there is a room on top of the roof (outside of the main volume, there is a natural hole (red arrow) in the roof (green arrow) in SketchUp.
Image
Since the EASE import process closes all holes, the external room on the roof will not belong to the internal air volume in EASE. That’s why you have to modify the roof, so that there are no Faces with holes. To do this, you can easily split the roof Face into at least two parts:Image
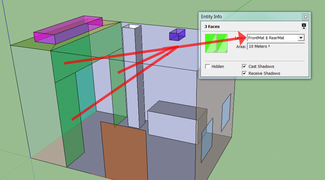
- Internal Faces that are exposed on both sides must be “Two Fold” in EASE. That’s why you put them on a special Two-Fold Layer, here called “FrontMat $ RearMat”:
Image
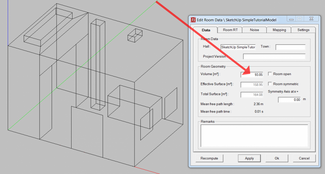
- After the Import process, press F5 to “Check Data”. From the Edit Rom Data window, verify that you have a positive volume calculated. To do this, click Edit > Room Data from the top menu of the Room Editor.
Image
Applies to:
EASE 4


